Taking screenshots on Windows is a fundamental skill for anyone working with a PC. Whether you need to capture a full screen, an active window, or a specific portion of your display, Windows offers several built-in methods to take screenshots efficiently. In this updated guide, we will walk you through the best ways to capture screenshots on Windows, providing easy, step-by-step instructions.
Why You Need to Know How to Take a Screenshot on Windows
Screenshots are essential for a variety of tasks, including sharing information, troubleshooting issues, creating tutorials, and documenting online activities. By mastering screenshot techniques, you can save time and ensure you’re able to capture exactly what you need from your screen.
Here’s how to take a screenshot on Windows using different methods:
1. How to Take a Screenshot of the Entire Screen
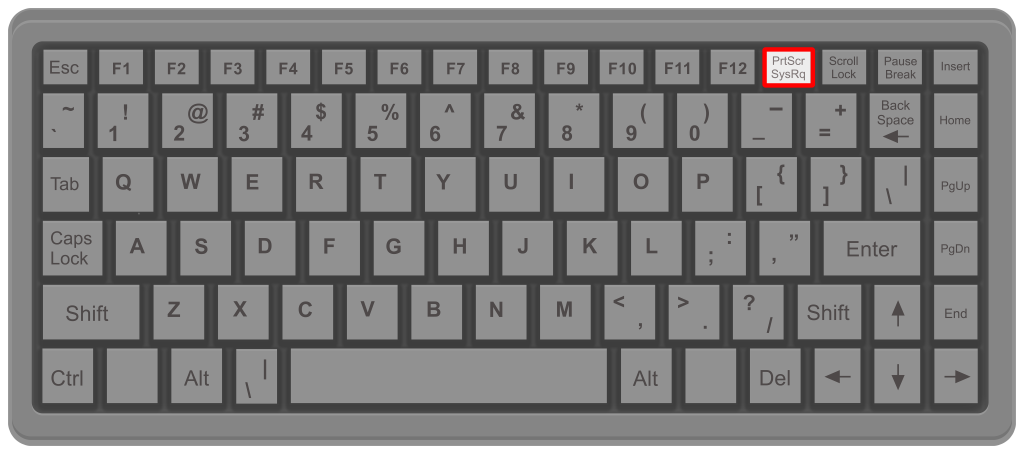
Step 1: Press the PrtScn Key

- To capture your entire screen, press the PrtScn (Print Screen) key on your keyboard. This will take a screenshot of the entire display and copy it to your clipboard.
- The PrtScn key is usually located near the top-right corner of your keyboard.
Step 2: Paste the Screenshot into an Image Editor
- Open an image editing tool like Paint or Photoshop.
- Press Ctrl + V to paste the screenshot from your clipboard into the editor.
Step 3: Save the Screenshot
- Once pasted, go to File > Save As, select the format (e.g., PNG, JPEG), choose your location, and save the screenshot.
Pro Tip: Use this method if you need to quickly capture everything on your screen and make simple edits later.


